

Bow
I have been fascinated by archery my entire life. When I was 6 or 7 years old I would visit my grandparents in Arkansas several times a year. My grandpa and I spent the majority of our time in the “crawl hole,” a basement like area under their house. It was a proper man cave. Dirt floor, endless tools, trophies from various activities, all kinds of man toys. This was one of my favorite places in the world growing up.

Some of my most cherished memories from that time revolve around making bows and arrows with my grandfather. Our simple bows made from saplings and string were some of the coolest toys I ever had.
I didn’t get to shoot often since we lived in the city, so I moved my love of archery into the digital world. I played all the games with bows involved, even choosing the underpowered bow characters to compete with their firearm wielding counterparts.
After years of research and deliberation, I finally decided to buy myself a proper bow, the Samick Sage. I went with a takedown recurve design because it’s simple and super portable. It can quickly be taken down to stow away in the Scamp. I would eventually like to have a compound bow when we have more space, but the takedown recurve is the best option for the limited space I’m working with. Also, compound bows require a fair bit of knowledge and tools to maintain and tune. The recurve is just a bow and a string.
Next decision was draw weight, or the poundage of pull required to pull the bow back to 28 inches. Low draw weights are easier to pull back, while high draw weights launch arrows at faster speeds. I watched a lot of videos discussing draw weights and came to the conclusion that as beginners, we should start low. This way we can dial in our form and put a lot of arrows through the bow without tiring. Whenever I decide to step up the draw weight, if I want to start hunting with it for instance, I can buy new limbs and step up the draw weight of the bow for around 60$.
Arrows
It’s wild how much complexity can go into arrow selection. This is part of what deterred me from buying a bow in the past, too many variables to consider. I found these 30 inch carbon arrows. Technically, the arrows I bought are likely a bit too stiff for my bow. They are rated for higher draw weight compound bows, but they have worked great so far.
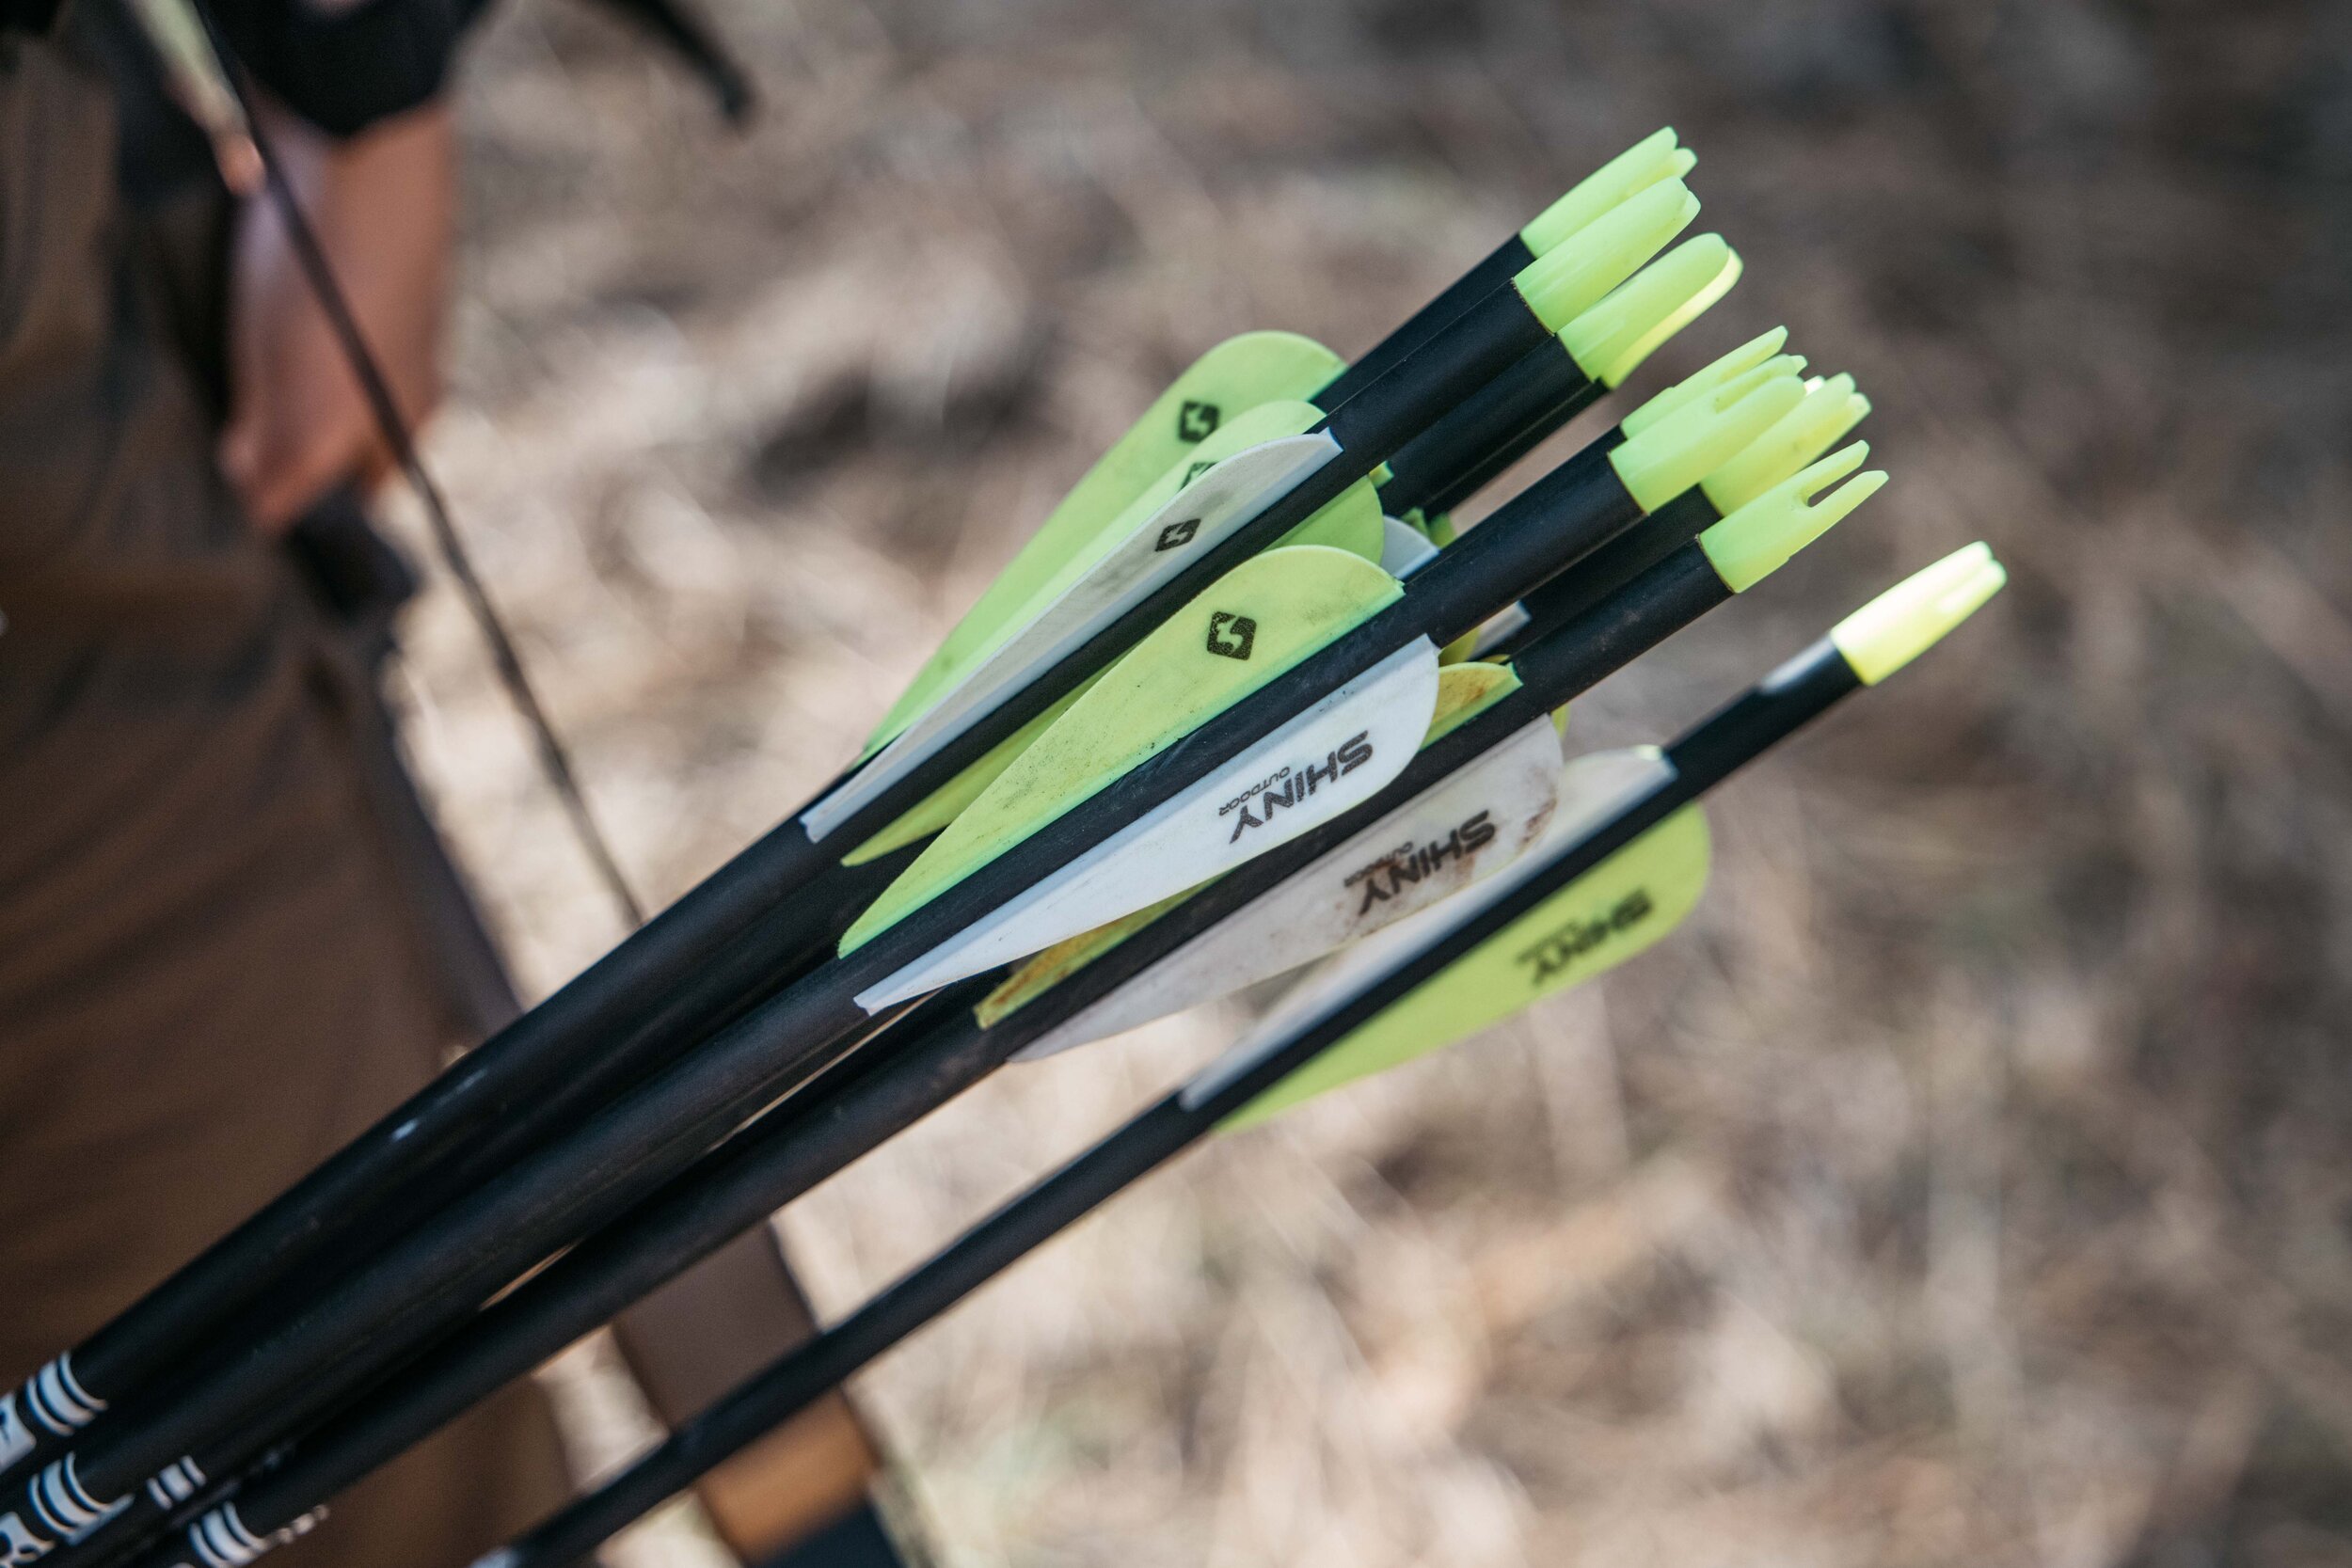
These arrows have a rubbery, plastic fletching. Fletching is the feathers or veins on the back of the arrow that help the arrow fly straight. Typically with a recurve, or traditional non compound bow, people use feathered fletching. The feathers allow you to shoot arrows directly off the arrow rest, because they compress as the arrow passes the bow. The rubber fletched arrows I purchased do not compress as they pass the shelf. If I were to shoot these arrows off the shelf of my bow, the fletching would bonk the shelf as it passed, causing the arrow to wonk back and forth. To remedy this, I bought an arrow rest that collapses flat as the fletching passes by, allowing the arrow a truer flight.

I went with these particular arrows because they are affordable, simple and durable. The traditional, wooden, feather fletched arrows just seem a bit too fragile for the abuse I will likely put this bow through. Also, traditional arrows are typically a bit more expensive and harder to find at sporting goods or big box stores. I wasn’t sure how well the arrows would work out, but they are plenty accurate for me, even at longer distances.
Quiver

Initially, I went with a simple hip quiver. Hip quivers are great because they’re easy to access. Putting arrows back into the hip quiver is easier than finagling them into a back mounted quiver. Hip quivers are easy to switch from person to person, if Elsa and I are shooting together I can quickly clip the quiver to her hip when it’s her turn to shoot.

For basic target or range shooting hip quivers are the simplest and most affordable option. That being said, as soon as Elsa realized she enjoyed shooting the bow she insisted that we get a back mounted quiver, just because they’re so cool. All the archers from the movies use back mounted quivers, they are inarguably cooler. They also are easier to move around with and they don’t clunk around as much as hip quivers. Having both types, it would be hard for me to choose which I prefer most. If you’re on a budget and want easier access to your arrows, go with a hip quiver. If you want to channel your inner Katniss, Legolas or Robin Hood, go with the back quiver.
Target
When I first started looking at bows I figured I could just shoot at tree stumps for practice. The bow arrived before my target did and I couldn’t wait to shoot it. I put 6 arrows into a tree stump and spent 20 minutes trying to yank them out. The arrows mentioned above come with sharp field points. If you do want to shoot at pinecones and stuff in the forest, blunt arrow heads are available. I honestly think a solid target is a must though.
The target I bought was the smallest and most affordable option I could find. It’s big enough to shoot at 20ish yards and consistently hit, as a noob. It is well marked and can be re-sprayed if the paint wears out.
Elsa and I have put hundreds of arrows into it in the last couple weeks and it shows no signs of detrimental wear. I anticipate getting years of use out of this target.

Forearm Guard

Forearm guards are commonly used by archers of all skill levels. I have smacked my forearm a number of times with a bow string in the past, it hurts. With this bow though, I haven’t glanced the arm guard yet. This could be due to the low draw weight, I’m not entirely sure. A forearm guard is good, cheap insurance if you plan on shooting often.
3 Finger Archery Glove
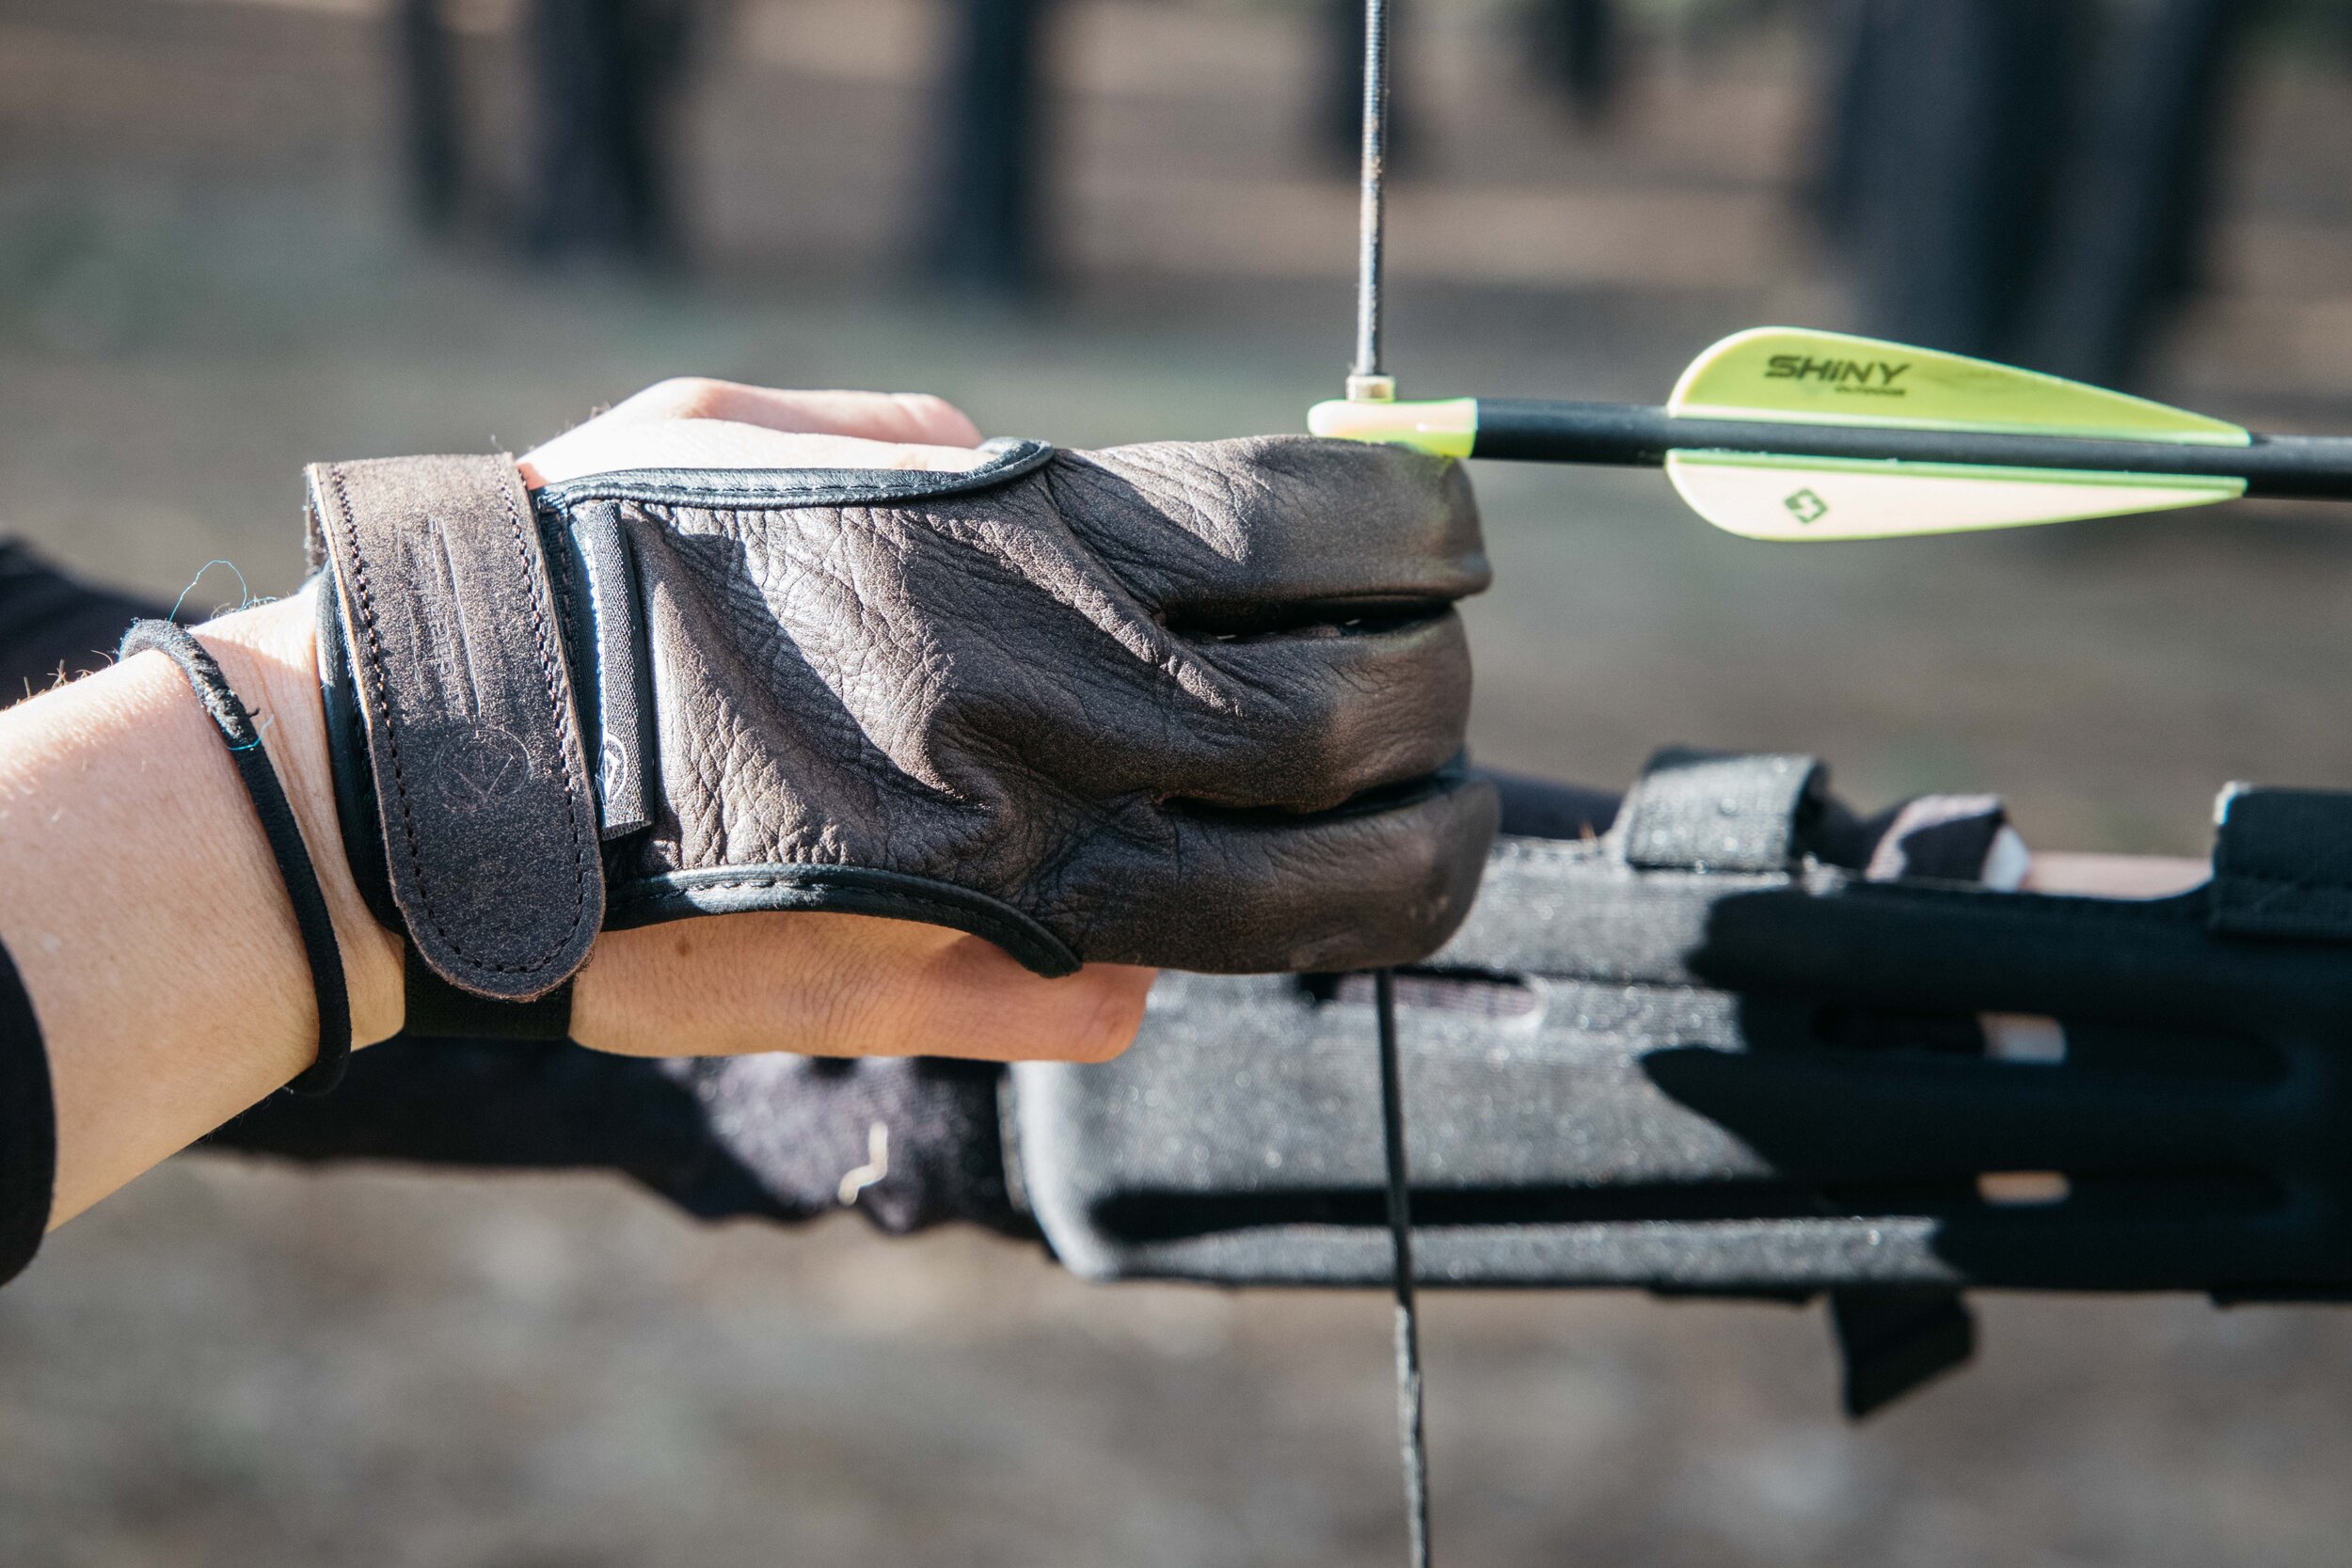
When we first got the bow, I didn’t order shooting gloves. I wanted to try it out before deciding if we would need them and what kind we wanted. The bow can be shot bare handed, though its a bit rough on the fingers. Initially, we just used mechanic style gloves we had laying around. They worked fine, but a proper archery glove made a big difference in comfort and accuracy for us.
Tabs are another option for finger protection. I may try one of these in the future, but the 3 finger glove is just simple and made sense to me. If you buy the gloves we did, make sure to measure your hand to choose the sizes. They run pretty tight, I went with a large and Elsa got a small. The wrist strap is pretty tight on the wide part of our hands, but I think they’ll stretch over time.
String Silencers
I ordered some cat whisker style, rubber string silencers with the bow. They were 8$ and I thought they would be cool. They do reduce the noise the bow makes significantly. I ended up attaching them with zip ties, because the thread types we had in the Scamp kept breaking. True archers would likely scoff at the zip ties, but they work great.
Final Thoughts
This archery kit has been an absolute blast. All together the kit was about $200. Elsa and I have been shooting every day. We are so happy to have picked up this new hobby.
Let me know in the comments if you have any questions or suggestions. 🏹
